Good Parchisi strategy means choosing what the position needs: race when you can secure progress, capture when the reward is usable, and block when delaying a rival helps more than moving ahead.
These three situations use the two-dice Parchisi baseline: separate die moves, a 20-space capture bonus, a 10-space finishing bonus and impassable same-colour pairs. They are teaching examples, not guaranteed winning moves. Remix’s powers can change the choice.
1. Race when you can finish
Position: roll 6 and 2. Pawn A is six spaces from the goal in its own lane. Another yellow pawn, B, is on track square 20.
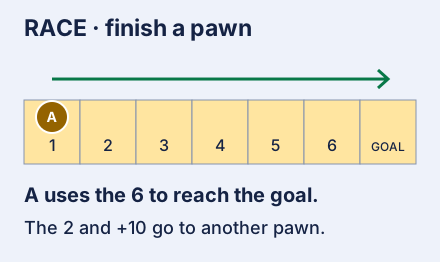
Suggested move: finish A with the six. Use the separate +10 to move B from 20 to 30, then the two to reach 32. The exact finish removes one pawn from the race and earns progress elsewhere.
Alternative: spend the six on B instead. Consider that if it secures an urgent capture or escape; otherwise, taking the available finish is a useful default.
2. Capture when the bonus has somewhere to go
Position: roll 4 and 2. A is on 20; an unprotected blue pawn is on 24. Your B is on 40.
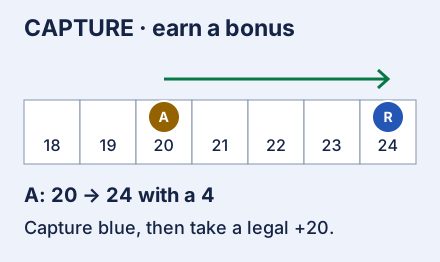
Suggested move: use four to capture on 24, then the +20 to move A from 24 to 44. Use two to move B to 42. Check the entire bonus route first: a barrier could make it unusable.
Alternative: advance B with the four. That may be better if A’s capture exposes a nearly finished pawn to an immediate reply. A bonus is valuable, but safety and the rival’s progress matter too.
3. Block when the delay is worth it
Position: roll 4 and 2. A is on 20, B on 24, and a blue rival on 18. Your C is ahead on 40.
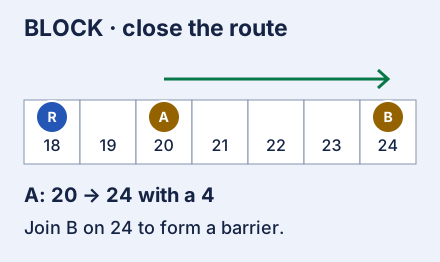
Suggested move: move A four spaces onto B, forming a barrier on 24. Use two on C, moving it to 42 without breaking the pair. Blue cannot land on or pass the barrier.
Alternative: move B onward to keep racing. Prefer that when the barrier would hold back your own trailing pawns or accomplish little. Reassess next turn; check your edition’s doubles rule for forced barrier breaks.
Before committing, check both dice, the landing squares and any earned bonus. For saved dice, Crew roles and Tricks, see the Parchisi Remix rulebook.
Rules behind the examples
Rules checked 19 November 2026 against BlackLight’s Parchisi rules and Northwestern’s Parcheesi movement, capture, barrier and exact-finish rules. Positions, diagrams and strategic explanations are original; these are reasoned choices, not simulation results.